Connect with a verified veterinarian in minutes. Licensed vets are available 24/7 to answer your questions. No need to worry about your furry family member.
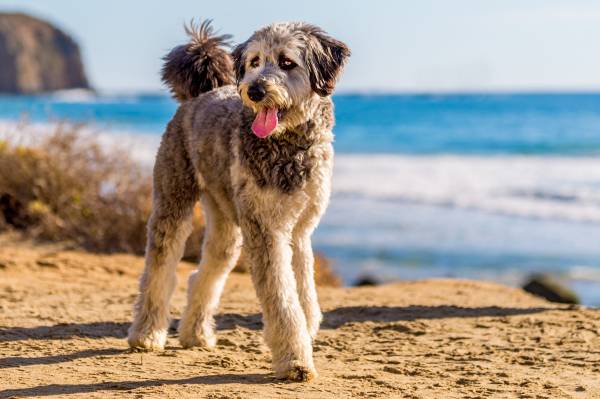
Since Labradoodles have combined characteristics of their parents; the Labrador Retriever and Toy poodles, they grow long non-shedding coats.
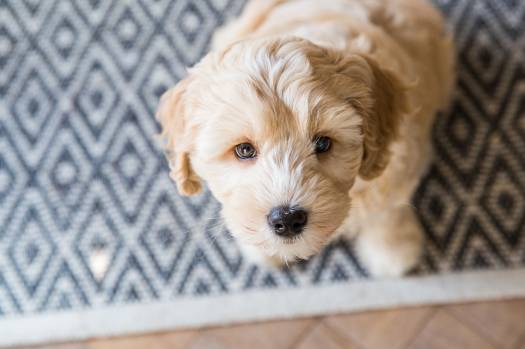
Take a look at your cute labradoodle and see how the hair is starting to cover the eyes. Even the nose and ears can hardly be seen.
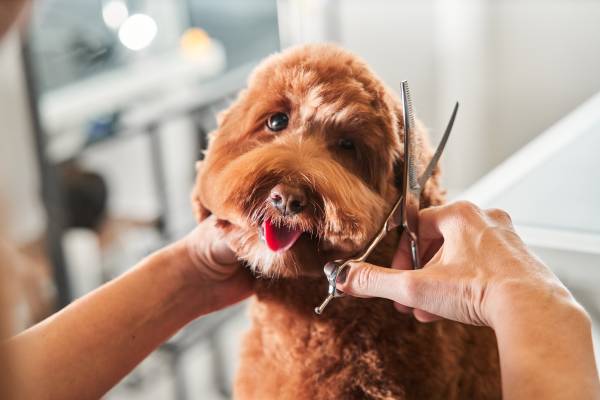
The fact is, if you neglect the hair growth thinking it would stop, then you are mistaken. Before you realize it, your dog will have excessive hair that starts to tangle and form mattes. At this point, your dog is nothing close to cute anymore. However, you can avoid that by grooming your dog regularly. You could choose to see a professional or do the grooming yourself. Since you are here for the latter, then let’s get right to it.
Before we talk about different ways of grooming and how to go about it, let’s look at essential tools for grooming.
Tools for grooming
A brush
A brush is essential when grooming and cleaning a Labradoodle. A brush helps untangle the hair, rid it of possible dirt, and removing residues after shaving the dog.
Clipper
The clipper is a dog clipper. The clipper is used to remove excess hair quickly and neatly. It comes with various sizes of blades that can be used for different body parts.
Scissors
A scissors is applicable when reducing the fur of a labradoodle. It helps to remove hair where the clipper cannot get to.
Thinning shears
A perfect tool to trim a labradoodle after having a fur cut session. It helps to ensure all parts are level without a part looking longer than the other.
Nail cutter
When a labradoodle is groomed, the nails are included. And as such, a nail cutter is necessary as a clipper cannot work on the nails.
Styptic powder
The powder helps to stop bleeding. So, for first-timers, having a styptic powder is vital in case the nail starts to bleed due to mistakes while cutting it.
Now that we know the tools, the next stage focuses on regular cleaning procedures, and things to do before giving your labradoodle are coat cut.
Bathing and brushing
These two things are essential to keeping your dog clean and healthy. Bathing should be more regular than shaving. It should be done about twice a month. Every time you bathe your labradoodle using soothing body shampoo, ensure to brush the body well.
Keeping to the routine of bathing and brushing is not enough. When the hair of your dog starts to grow excessively, then shaving should suffice.
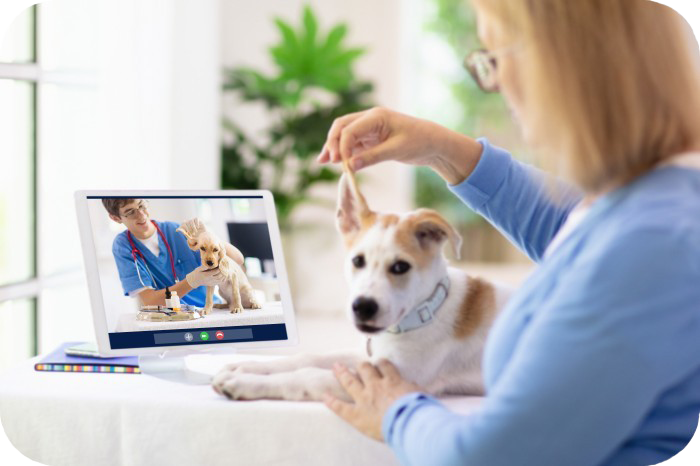
Review symptoms, medications & behavior to keep your pets healthy with a Vet Online in just minutes.
Ask a Vet Live NowHow to groom your Labradoodle
The tools we talked about earlier will prove useful here. Besides, for convenience and stability, get a grooming table to place your dog. And wait! Get treats too, lots of treats.
Step 1
Tools sniffing
Let your labradoodle sniff all the tools to be used (yes, and the clipper inclusive). Doing this helps your dog get familiar with the tools.
Step 2
Bathing, drying, and brushing
Bathe your dog. Apply a mild and non-skin drying shampoo. Rub it with water all over and lather it. Then rinse off with adequate water.
After this, get a towel or blow-dry your dog. Ensure to properly rid the coat of water to prevent the clipper from getting tangled with hair while shaving. The importance of bathing is to make the hair clean and also to make it soft for the clipper to cut.
Lastly, brush the dog to straighten the hair and reduce the tangles if there are any.
Step 3
The back
Tie your dog with a leash to restrict the dog’s movement. Make the labradoodle sit. Then put a blade of 10 inches on the clipper and get ready to shave.
Start shaving the back first. Shave it from top to bottom in a straight-line fashion. Do this gently and keep praising the dog and occasionally stop to give some treats. Shaving from up to down makes it easy for the clipper to remove hairs more and quickly.
As you shave the back, move your hands to the sides too. Shave the right and left in the same up to the down pattern.
Step 4
The belly
Use a blade size of 5 or 6 inches here. Next, move to the belly, let your dog stand on fours. Now, use the clipper to trim the chest down to the belly. Be careful to leave out the Labradoodles’ reproductive region (It can be trimmed with scissors later).
Step 5
The legs and nail
The next part is the legs. Use a blade size of 5 inches here. Then, shave the hair from the top and stop before you get to the paws. Work on all the legs and do it gently.
After using the clipper on the legs, get your scissors, and use it to trim the paws; removing mattes and tangles carefully. Use a 1-inch blade here to remove the short length hair in this region before switching to a pair of scissors.
Next, get the nail cutter and cut the nails. Just reduce the length, don’t cut it all.
Step 6
The ear
Use a 5 or 6-inch blade to work on the ear area. Use the clipper to work around it and some parts of the head.
Now, because the hair in the ear region is short, it’s best to use scissors to cut close to the ear. The inside of the ear should be trimmed with caution using the thinning shears.
Step 7
The face
The face should be worked on at this stage. Use an 8 or 9-inch blade here.
Shave the cheeks, and the forehead using a clipper. Now, switch to scissors to work around the nose and eyes. Always hold on to the hair around this region before cutting to be on the safe side.
Step 8
The tail
The last part is the tail. Use the thinning shears for the tail. Try to remove excess hair carefully.
Step 9
Trimming and brushing
Trim the hair all over again. Look for irregular places and level the hair. Next, use the brush to remove leftover hair and use the hands to ascertain if all mattes and tangles are gone.
Done! You did well!
By following these nine steps, you can groom your dog regularly without having to spend a lot. At first, it may take time, but later it becomes easy. Nonetheless, no matter how easy or simple the grooming process seems, always remember to never rush through it so that you don’t hurt your dog.
Connect with a verified veterinarian in minutes. Licensed vets are available 24/7 to answer your questions. No need to worry about your furry family member.

Julie
Julie is a graduate of the University of North Carolina, Wilmington, where she studied Animal science. Though contrary to the opinion of her parents she was meant to study pharmacy, but she was in love with animals especially cats. Julie currently works in an animal research institute (NGO) in California and loves spending quality time with her little cat. She has the passion for making research about animals, how they survive, their way of life among others and publishes it. Julie is also happily married with two kids.
Review symptoms, medications & behavior to keep your pets healthy with a Vet Online in just minutes.
Ask a Vet Live Now